Where do I find my Google Ads details?
Google Ads needs a Conversion ID and a Conversion label, both of which come from a conversion action you create yourself. The choice you make in step 5 decides whether cPixel can ever add server-side conversions later, and it cannot be changed afterwards without losing the action's history.
- Conversion ID AW- followed by ~10 digits
- Conversion label a ~20-character string
Screenshots are from a live account. Account names, IDs, tokens and email addresses are blanked out — yours will show real values in those places.
-
Go to Goals → Conversions → Summary
If you have never set up conversion tracking, this page is mostly an empty state with a New conversion action button. That is the right place to start.
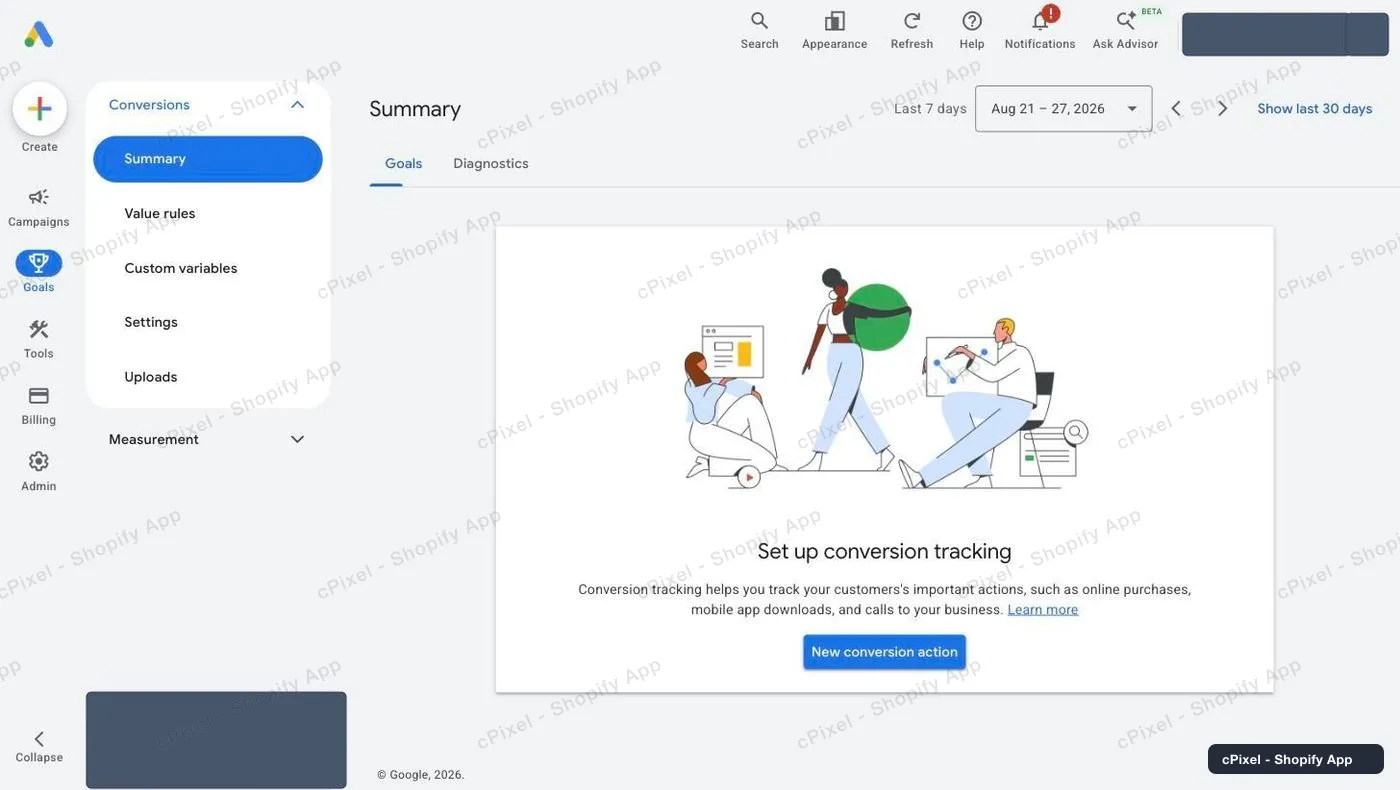
Goals → Conversions → Summary, before any conversion action exists. -
Choose “Conversions on a website” — and untick phone calls
Google pre-ticks Conversions from phone calls for you. Untick it unless you actually want call tracking, or you will spend the rest of the wizard configuring something you did not ask for. Then click Add URL on the website row.
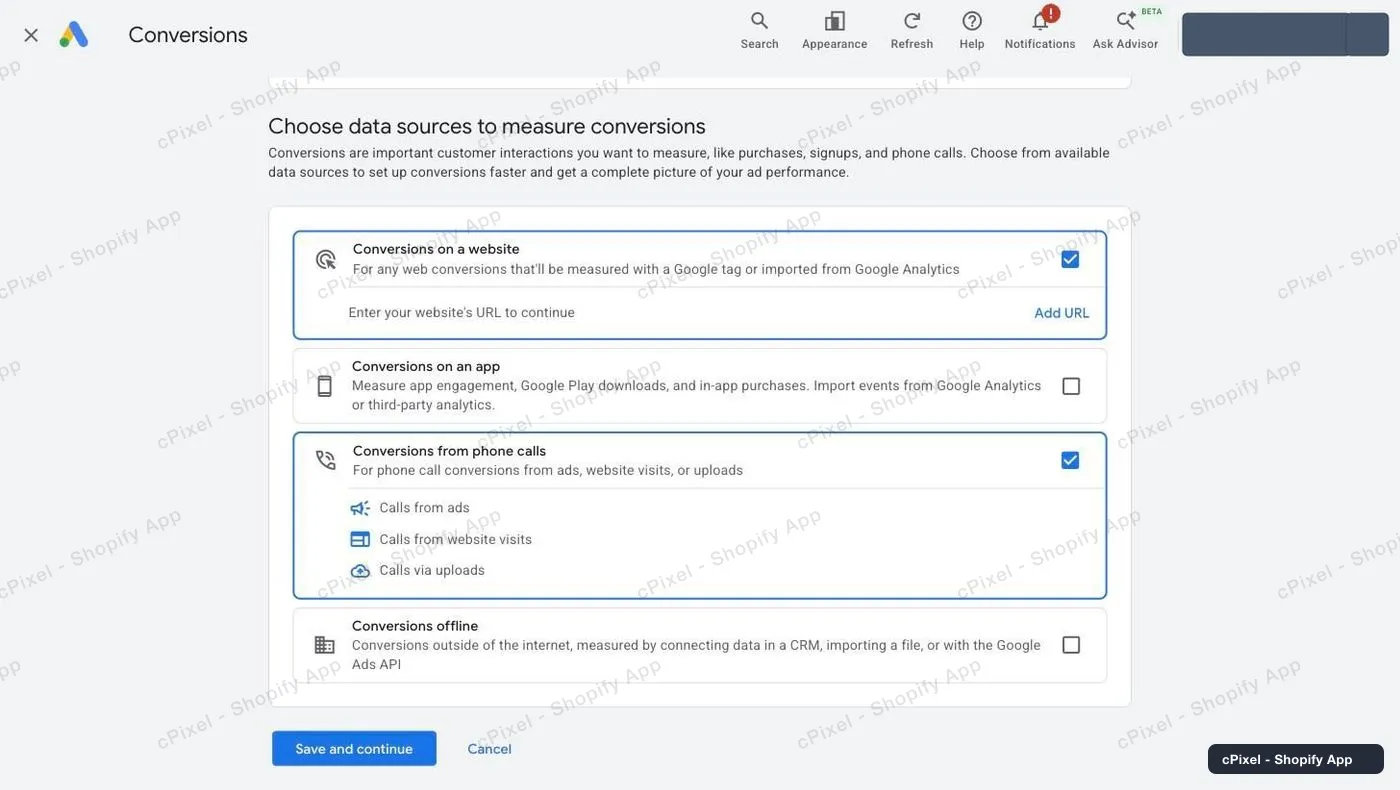
Only “Conversions on a website” should stay ticked for cPixel. -
Scan your store, then pick Google tag
Enter your store domain —
your-store.myshopify.comworks — and press Scan. Google lists the data sources it found. Tick Google tag. “Not installed yet” is expected and correct: cPixel is what will install it. If it also offers to link a Google Analytics property, leave that alone.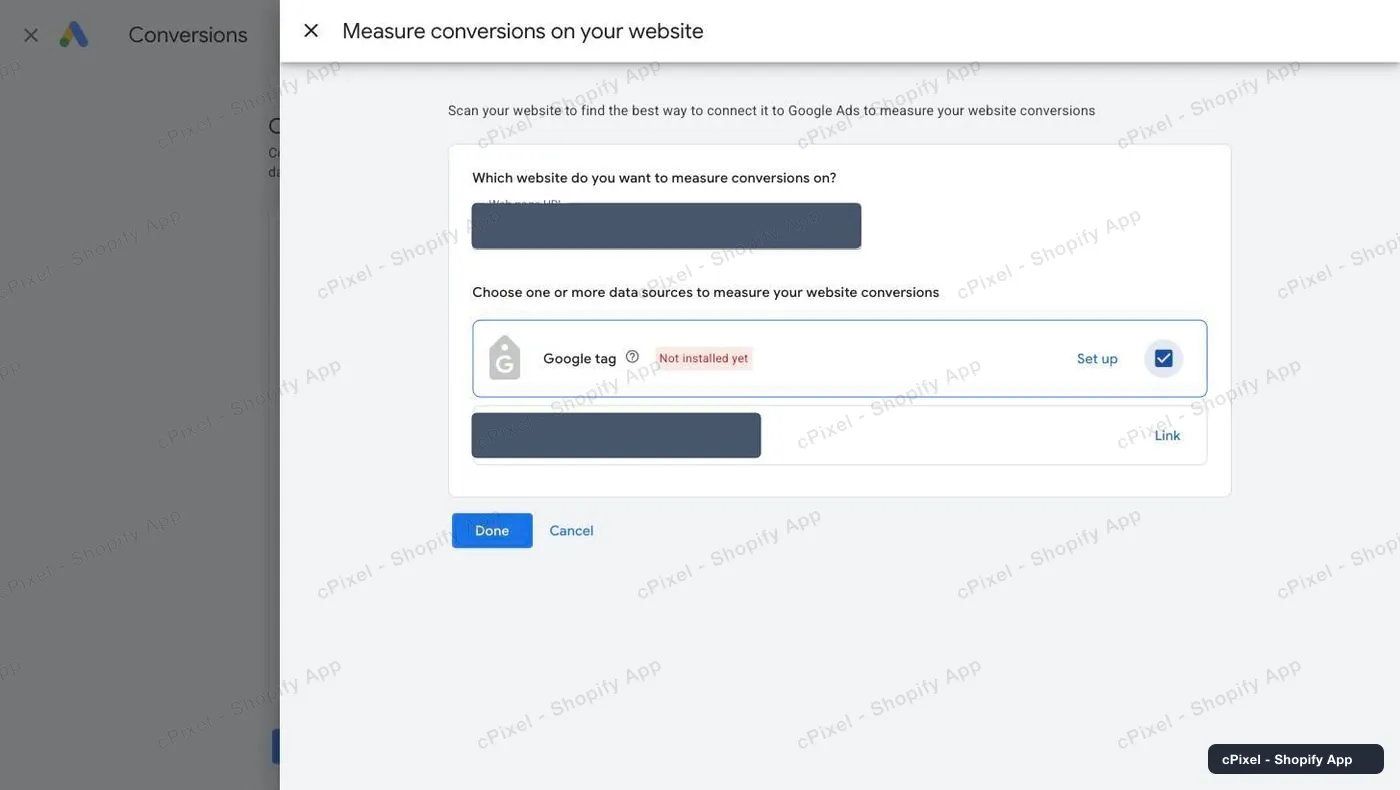
The scan result. Tick Google tag; ignore the Analytics link offer. -
Choose the Purchase category
Pick Purchase — when someone completes a purchase or checkout flow. Use one conversion action for purchases only; pointing cPixel at a page-view action would report every visit as a sale.
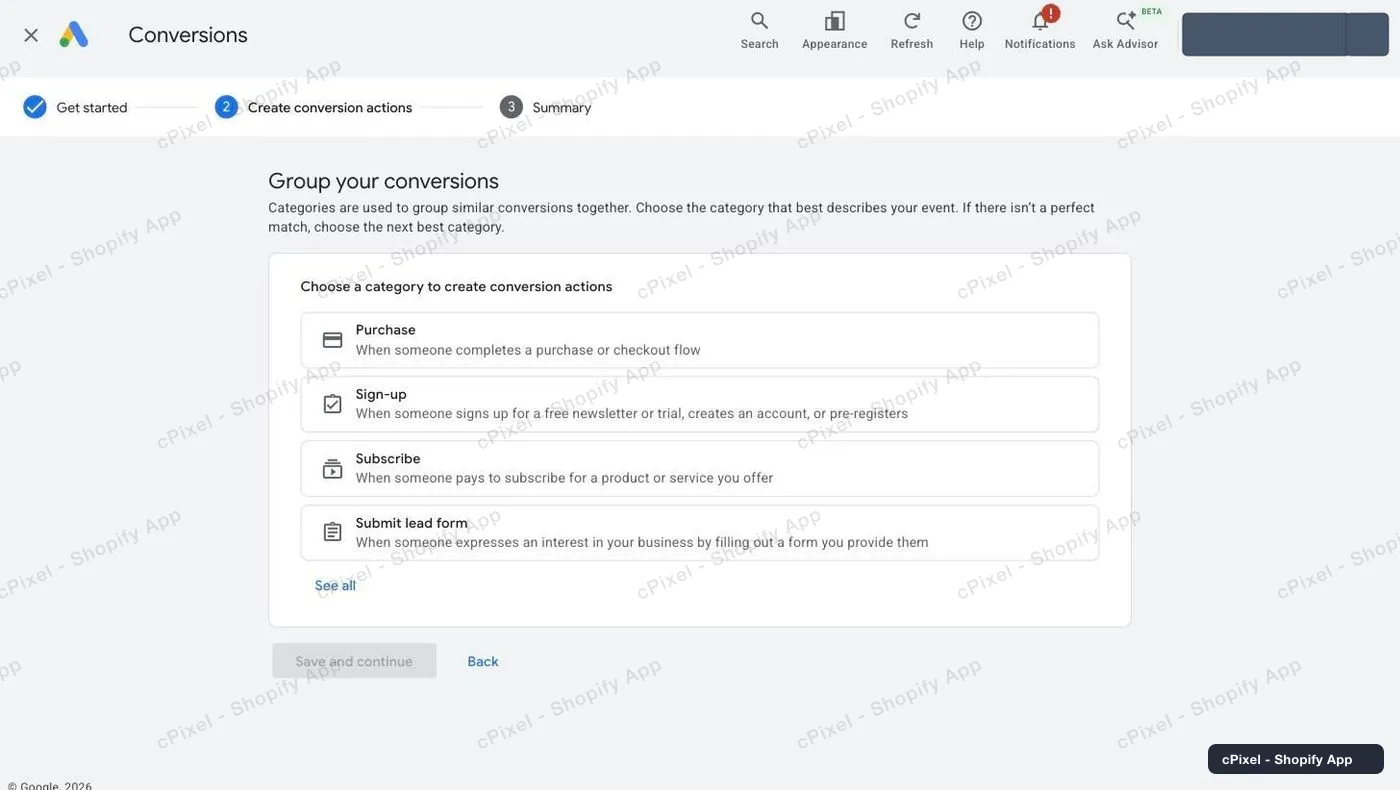
Category decides how Google groups and reports the conversion. -
Choose “Manually with code” — this one matters
Google offers Manually with code or Automatically without code. Choose Manually with code. This is the choice that decides whether the action can ever be topped up from a server, and Google does not let you change it later without losing the action's history.
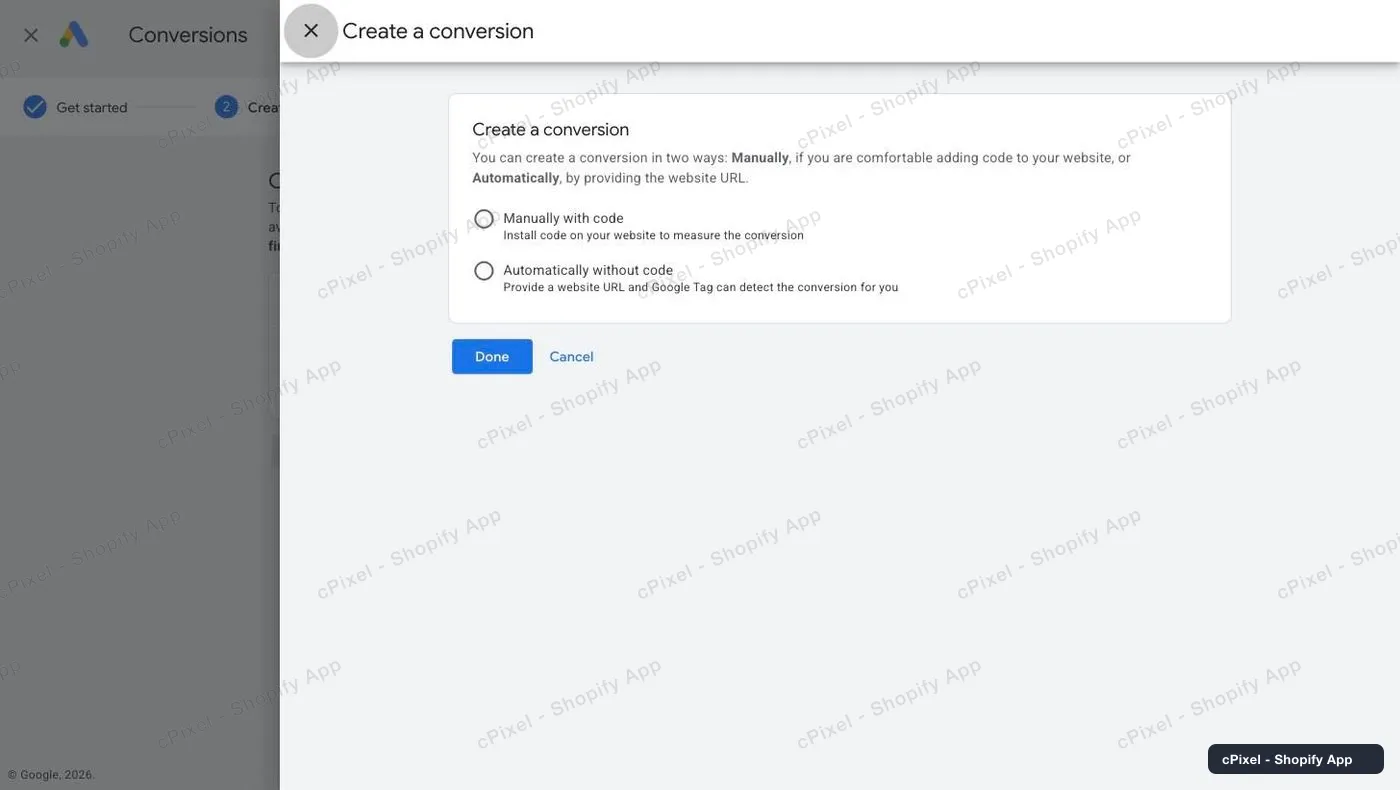
Manually with code. Not “Automatically without code”. -
Read the Conversion ID and label
Finish the wizard, then open the conversion action and click Manage beside its data source. Switch to the Use Google Tag Manager tab — it prints Conversion name, Conversion label and Conversion ID as a plain table, which is far easier than digging them out of the tag snippet. Prefix the ID with
AW-when you paste it into cPixel.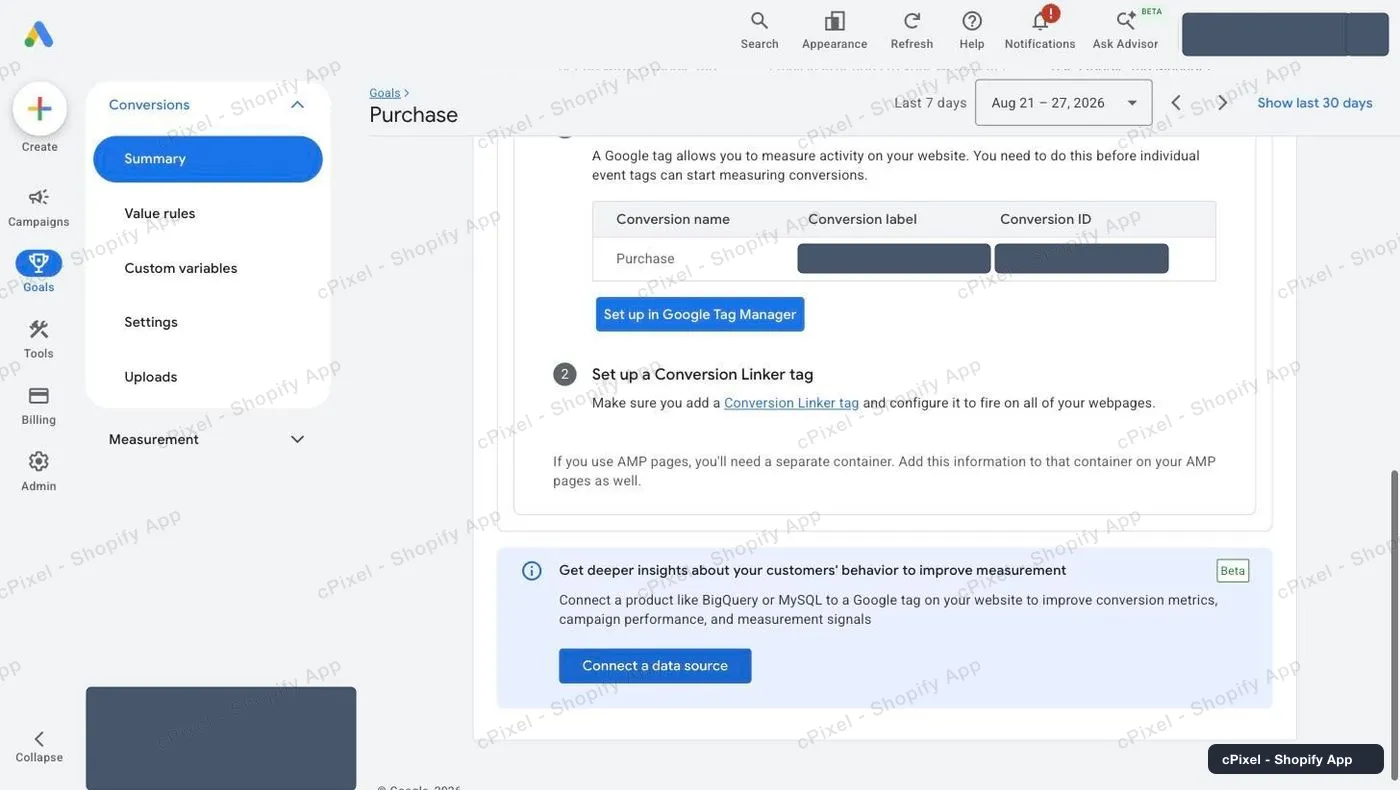
The Google Tag Manager tab is the quickest way to read both values.
Only a manually-created action can be topped up from a server
Conversion actions Google built from a URL rule, and ones imported from Google Analytics, can never be supplemented with server-side conversions. If you point cPixel at one of those, the browser tag will work and the server leg will never be addable. Pick an action you created yourself with the tag, as in step 5.
Good to know
- A brand-new action reads Inactive and its goal reads Misconfigured until the tag fires for the first time. That is expected before cPixel is connected.
- Conversions can take up to 24 hours to appear in Google Ads reports even when the send succeeded.
- Enhanced conversions is ticked by default at the end of the wizard. Leaving it on improves match rates and is what cPixel's hashed email and phone are for.
Server-side API token Nothing to collect
There is no API token to collect for Google Ads — not now, not later. Server-side conversions go through the Google Ads API, which authenticates by OAuth against a verified application plus a developer token, so it is something cPixel connects on your behalf rather than a key you paste. Be wary of any app whose Google Ads setup asks you to "create a Google Cloud project": that is the OAuth requirement being handed to you, and it is a developer job, not a merchant one. Two things you *can* do now:
- Step 5 above is the one that matters. Creating the action manually with code is what keeps a server leg addable at all — an action Google built from a URL rule, or imported from Analytics, can never be topped up later.
- Note your Customer ID. It is the
XXX-XXX-XXXXnumber in the top right of Google Ads, beside your email. Every server-side integration needs it, and the API wants it without the dashes. It is an account identifier, not a secret — it identifies which account to write to, and authenticates nothing on its own. - Optionally enable Enhanced conversions on the action (Tools → Conversions → your action). It improves match rates using the hashed email and phone cPixel already sends, and the wizard ticks it for you at the end of setup.
Checking it worked
Start a live session in cPixel and place a test order. The Google Ads send shows its conversion ID, label and order ID.
Google Ads's own documentation
What cPixel is
cPixel is a Shopify app that tracks your store's events and reports them to your ad platforms — from the shopper's browser and from our servers, through each platform's Conversions API. Browser tracking is free and unmetered on every plan; server-side sending is what the paid tiers add, and it is what keeps conversions arriving when a browser blocks the pixel, drops the tag, or never runs it at all.
- One event ID across both legs. Every purchase is sent with the same deterministic id from the browser and from the server, so the platform keeps one conversion instead of counting it twice.
- A live view of every server send. Open a debug session and watch each event as it goes out: the payload, the platform's response, whether it deduplicated, and exactly which match parameters were present. It is on the free plan too — you can see what cPixel sends before you pay for anything.
- Every platform on every plan. Plans differ in one field only: how many orders a month are included. No feature, platform or account limit is tied to price, and up to 10 accounts per platform are available on all of them.
- Nothing to install into your theme. Tracking rides Shopify's own web pixel and app-embed surfaces — no script tags, no theme file edits, and a clean uninstall.
Priced on monthly orders, nothing else — not traffic, not your Shopify plan, not the number of platforms you connect. Free installs get 7 days with no cap at all, and on the paid tiers server-side sending is never switched off for going over.