Where do I find my Snapchat details?
Snapchat needs two values: the Snap Pixel ID and a Conversions API access token. cPixel fires the storefront tag through the theme app embed and sends checkout and purchase events server-side.
- Snap Pixel ID a UUID: xxxxxxxx-xxxx-xxxx-xxxx-xxxxxxxxxxxx
Screenshots are from a live account. Account names, IDs, tokens and email addresses are blanked out — yours will show real values in those places.
-
Open Events Manager
Snapchat drops you into Ads Manager, or straight into campaign creation. Use the dropdown at the very top left — it reads Create Ads or Manage Ads depending on where you landed — and choose Events Manager.
-
Open your Snap Pixel under Event Sources
The left rail lists Event Sources; your pixel is under it. Open it, or use New Event Source if the account has none yet.
-
Copy the Pixel ID from under the pixel name
The ID is printed directly beneath the pixel's name, as ID: xxxxxxxx-xxxx-xxxx-xxxx-xxxxxxxxxxxx — a UUID, five groups of hex separated by dashes. Copy the whole thing, dashes included, and paste it into cPixel. It also appears in the address bar after
/events/pixel/.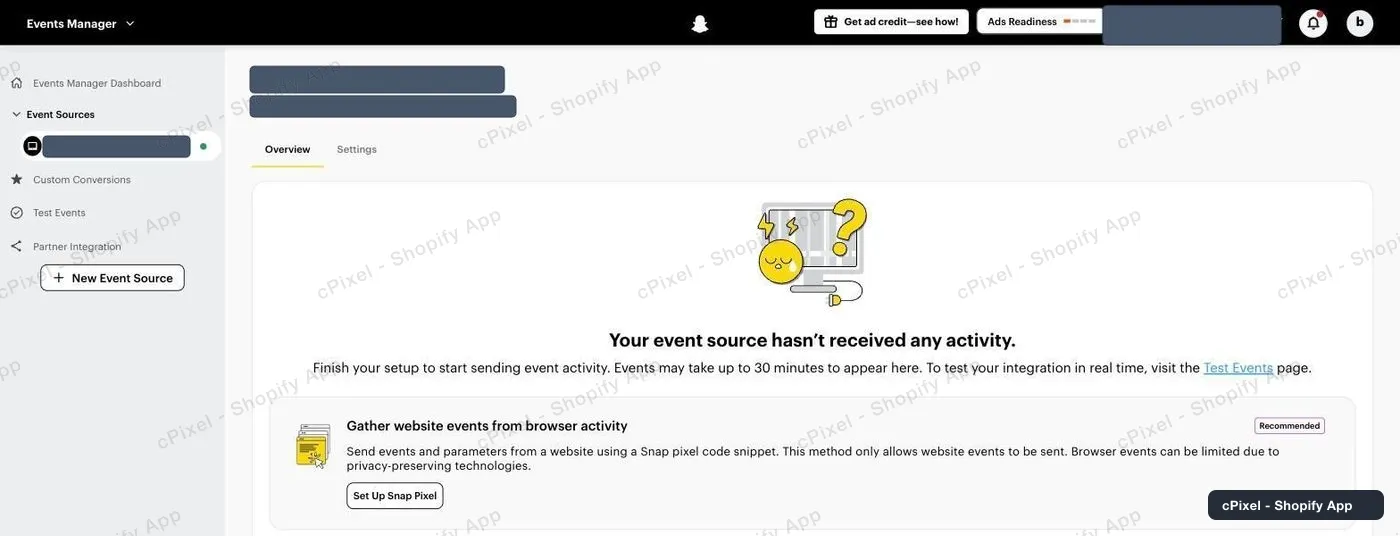
The Pixel ID sits under the pixel name. “Hasn't received any activity” is expected until cPixel sends.
Two legs, covering different pages
Snapchat's browser tag runs through the theme app embed, so it only fires on your storefront — Shopify does not let a theme run on checkout or the thank-you page. cPixel sends those events server-side through the Conversions API instead, so purchases ARE tracked even though the tag never sees them. The storefront tag itself sends nothing until the cPixel app embed is switched on in your theme.
Good to know
- Copy the whole ID including the dashes. Snapchat rejects it without them.
- The overview offers Set Up Snap Pixel and Set Up Conversions API. You need neither — cPixel is the integration, and it only wants the ID. Snapchat's Conversions API token is not used today and the connect form does not ask for one.
- The Pixel ID is not the ad account ID, though both are UUIDs. The ad account ID is the first UUID in the address bar; the pixel ID is the one after
/events/pixel/.
Server-side API token Not needed yet
Snapchat does have a Conversions API, and the token is available now — but cPixel sends Snapchat browser-side only today, so there is nowhere to paste it yet. The route is not where you would guess: it is inside the event source's setup flow, not in a settings page.
- Open your Snap Pixel and, under Send events from a server, click Set Up Conversions API.
- In Set Up Method, choose Manual Setup — not Partner Integration, and not Conversions API Gateway.
- Step through to the end; the token is a long JWT shown with a Copy Access Token button.
- Snapchat also prints the endpoint it belongs to,
https://tr.snapchat.com/v3/<pixel-id>/events, which is a useful check that the token matches the pixel.
Checking it worked
Start a live session in cPixel and browse your storefront, then check Events Manager for activity.
Snapchat's own documentation
What cPixel is
cPixel is a Shopify app that tracks your store's events and reports them to your ad platforms — from the shopper's browser and from our servers, through each platform's Conversions API. Browser tracking is free and unmetered on every plan; server-side sending is what the paid tiers add, and it is what keeps conversions arriving when a browser blocks the pixel, drops the tag, or never runs it at all.
- One event ID across both legs. Every purchase is sent with the same deterministic id from the browser and from the server, so the platform keeps one conversion instead of counting it twice.
- A live view of every server send. Open a debug session and watch each event as it goes out: the payload, the platform's response, whether it deduplicated, and exactly which match parameters were present. It is on the free plan too — you can see what cPixel sends before you pay for anything.
- Every platform on every plan. Plans differ in one field only: how many orders a month are included. No feature, platform or account limit is tied to price, and up to 10 accounts per platform are available on all of them.
- Nothing to install into your theme. Tracking rides Shopify's own web pixel and app-embed surfaces — no script tags, no theme file edits, and a clean uninstall.
Priced on monthly orders, nothing else — not traffic, not your Shopify plan, not the number of platforms you connect. Free installs get 7 days with no cap at all, and on the paid tiers server-side sending is never switched off for going over.